1. THE OUTCOME
You will enforce internal email access levels in Google Workspace so specific users (by Organizational Unit) can send to and/or receive from only approved internal groups/domains, while everyone else keeps normal internal mail. When you’re done, users who try to email outside their allowed “internal scope” will get a clear rejection, and you’ll have a policy that’s auditable and maintainable.
2. BEFORE YOU START
- Required permissions: Sign in as a Super Admin or an admin role with Gmail compliance / routing privileges.
- Required access: Admin console at
admin.google.com. - Required structure: Users must be placed into the right Organizational Units (OUs) (or you must be ready to create one).
- Required browser: Current Chrome/Edge/Firefox. If settings don’t appear, refresh or try an incognito window.
- Optional but helpful: A test user in each OU (or at least two test accounts) to validate “allowed” vs “blocked” behavior.
- Time estimate:
- Simple “internal-only” restriction for one OU: ~15–30 minutes
- Fine-grained internal tiers + custom reject notices: ~45–60 minutes
Gmail rules can apply differently per OU. If you configure at the top-level and forget you’re scoped to an OU, you can accidentally change behavior for everyone.
3. THE STEPS
Step 1: Map your internal access levels
Decide the exact tiers you need before touching settings. Write them down in a 3-column table: OU name → Allowed recipients → What gets blocked.
Example tiers:
- Tier A (Executives): normal internal + approved external
- Tier B (Employees): normal internal, limited external
- Tier C (Students/Contractors): internal-only, or internal-only to specific groups
Expected result: You have a clear policy you can test (no guessing mid-setup).
If you can’t describe a tier in one sentence (“Can email only staff groups, not the full company”), it will be hard to implement cleanly.
Step 2: Create or confirm the Organizational Units
Navigate to Directory → Organizational units.
- Click Create organizational unit if you need a new tier (for example,
Restricted-Internal). - Move the target users into that OU.
Expected result: The users you want to restrict are in a dedicated OU you can scope Gmail rules to.
OU moves can take time to fully apply across Google services. Plan a short propagation window before final testing.
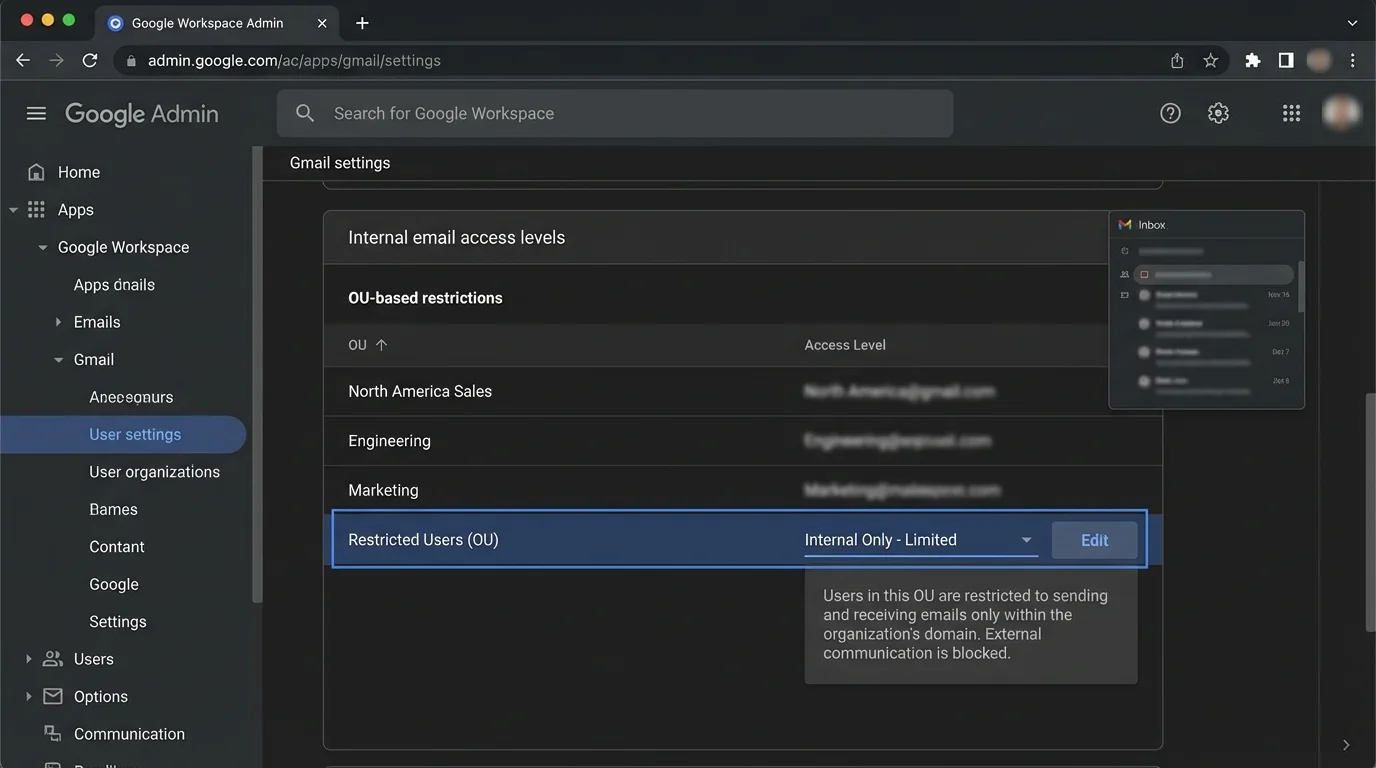
Step 3: Open Gmail’s Advanced settings for the correct OU
Navigate to Apps → Google Workspace → Gmail → Advanced settings (in some tenants this appears as Compliance).
- In the OU selector (top-left of the settings area), select the OU you will restrict (for example,
Restricted-Internal).
Expected result: You are editing Gmail settings for the intended OU, not the whole org.
Always re-check the OU selector before saving. Most “I blocked everyone” incidents are OU-scoping mistakes.
Step 4: Configure Restrict delivery for “internal-only” (or approved domain allowlist)
Scroll to Restrict delivery.
- Click Configure (or Add another rule).
- Under allowed senders/recipients, add domains you want to allow.
- For internal-only, allow only your Workspace domains, such as
example.com(and any secondary domains you use). - If you must allow a partner domain, add it explicitly (for example,
partner.org).
Expected result: The OU now has a domain-level boundary for email delivery.
Domain entry is usually accepted as example.com (you typically don’t need @example.com). If it fails validation, try the alternate format.
Step 5: Preserve internal email by enabling the internal bypass
In the same Restrict delivery rule, find and enable:
- Bypass this setting for internal messages
This prevents accidental internal disruptions when you’re restricting delivery.
Expected result: Internal email within your Workspace continues to work even if external is heavily restricted.
If you miss this checkbox, people can lose internal email unexpectedly. This is the most common “hidden setting” that breaks deployments.
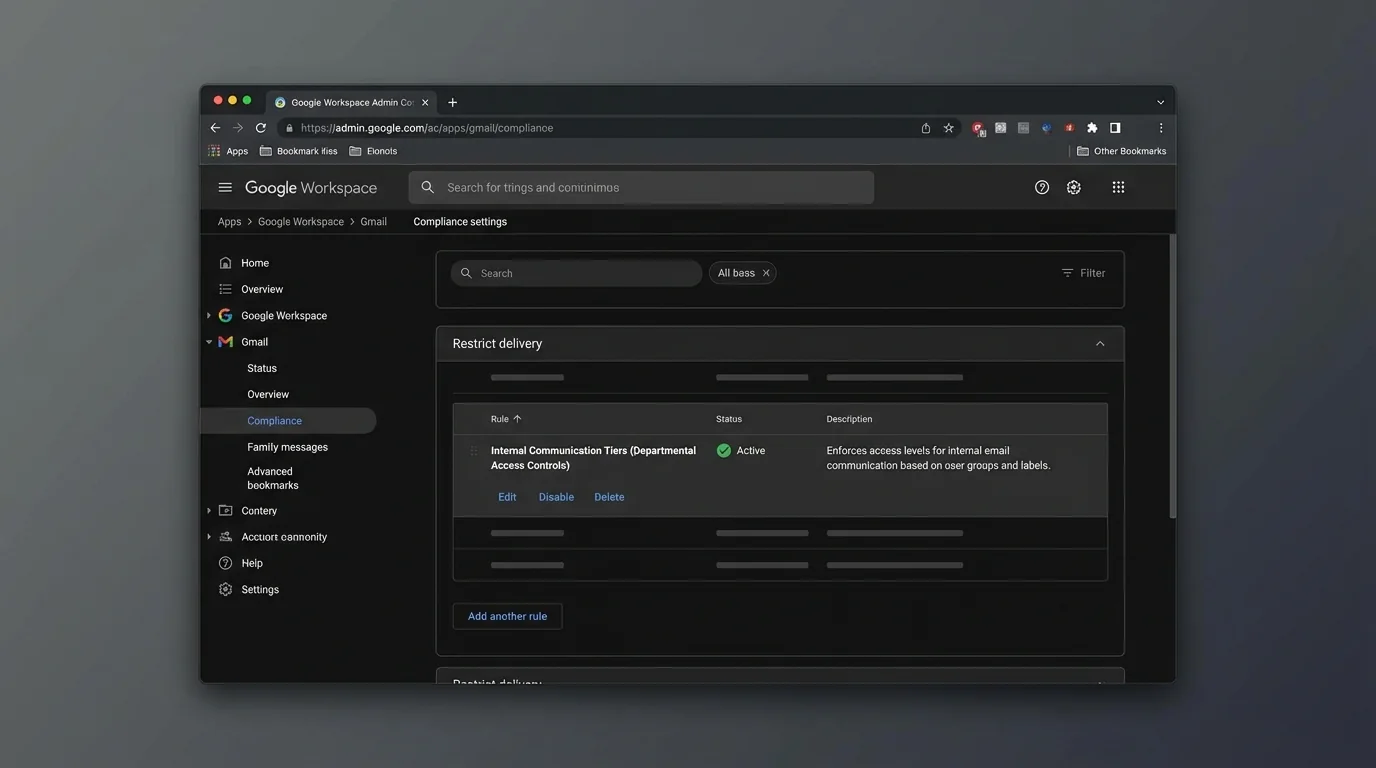
Step 6: Add a Gmail Content compliance rule for internal “tiering” (optional but common)
If “internal-only” is not enough and you need internal access levels (example: contractors can email only HR and their manager), use Content compliance.
Navigate (same page area): Apps → Google Workspace → Gmail → Advanced settings → locate Content compliance.
- Click Add to create a new rule.
- Name it clearly, like
OU Restricted: Allow only staff groups. - Configure conditions using envelope filters:
- Use Envelope recipient restrictions to target who they can send to.
- Use Envelope sender restrictions to target who can send to them.
Expected result: You have a rule framework that can enforce internal “who can email whom” beyond simple domain allowlists.
Use naming that answers: “Who is restricted, in what direction, to what scope?” Six months later, this saves hours.
Step 7: Define the “allowed internal recipients” precisely
In your Content compliance rule, set the condition to match what you want to allow.
Common approaches:
- Allow specific internal domains only: example.com
- Allow only certain internal groups by using address patterns (when your org has group-based addressing conventions)
- Allow only a subset of internal addresses using a regex pattern (advanced)
Then set the action for everything else to Reject.
Expected result: Messages outside the allowed internal scope are blocked consistently.
Regex mistakes can block too much or too little. If you use regex, test on a small pilot OU first.
Step 8: Set a custom rejection notice users will actually understand
In the same Content compliance rule’s action settings (after selecting Reject), configure a rejection message.
Use a short, blame-free message that tells the user what to do next.
Copy/paste example notice:
- This email was blocked by company policy. Your account can only email approved internal recipients. If this is required for work, contact IT and include the recipient address.
Expected result: Senders receive a clear reason instead of “it just disappeared.”
Most confusion tickets come from silent failures. A good rejection notice is cheaper than support.
Step 9: Control rule order and scope so it’s predictable
Back on the Gmail settings page, ensure:
- The rule is applied to the correct OU.
- The rule order is correct if multiple compliance/routing rules exist.
If your tenant supports rule ordering, place the most specific allow/deny rules above broad ones.
Expected result: The intended rule triggers first, and exceptions behave as expected.
Step 10: Save and document the policy
Click Save.
Then immediately record:
- OU name
- Rule name(s)
- Allowed domains/recipients
- Rejection message
- Date + owner
Expected result: You can audit and maintain the setup without reverse-engineering.
If your org has many ad-hoc rules, a one-page “Gmail policy inventory” prevents rule sprawl.
Step 11: Test with two accounts (allowed path and blocked path)
From a user in the restricted OU:
- Send an email to an allowed internal recipient.
- Send an email to a blocked internal recipient.
- (If applicable) send to an external address.
Expected result:
- Allowed message delivers normally.
- Blocked message is rejected with your custom notice.
Don’t skip testing because “it saved successfully.” Gmail policy changes can behave differently than expected due to scoping, rule order, or a missing bypass checkbox.
Step 12: Roll out in phases to avoid mass disruption
Apply the restriction to:
1) a pilot OU (5–20 users)
2) a larger OU
3) the full target population
Expected result: You catch edge cases (shared mailboxes, automated senders, internal apps) before a broad rollout.
4. COMMON PATTERNS (copy-paste ready)
These are real-world access level patterns admins implement. Adapt the values to your domains and OU structure.
Pattern 1: Internal-only for a restricted OU
- Where: Apps → Google Workspace → Gmail → Advanced settings → Restrict delivery
- Allowed domains:
example.com(plus any secondary internal domains) - Critical checkbox: Bypass this setting for internal messages = enabled
- Result: Users can’t send to or receive from external domains (depending on how you apply), but internal stays functional.
Pattern 2: Allow internal email only to a specific internal subdomain
Use this when internal identity is segmented (example: staff at staff.example.com).
- Allowed domain: staff.example.com
- Action for others: Reject (via compliance rule)
- Result: The restricted OU can email only addresses in that subdomain.
Pattern 3: Block internal email to “everyone” except approved teams
Use Content compliance when “internal-only” is still too open.
- Condition (Envelope recipient): matches only approved recipients (for example, role accounts like helpdesk@…, hr@…, manager@…)
- Action: Reject if it doesn’t match
- Rejection notice: Your account can only email approved internal addresses.
Pattern 4: Create a safe exception list for business-critical systems
Common exceptions:
- Ticketing aliases
- HR/payroll email
- Internal alerting systems
Implementation approach:
- Add a narrow allow rule above the deny rule.
- Keep exceptions in one place (one rule) instead of scattered.
5. THE BETTER WAY (KeepKnown)
Google Workspace restrictions are powerful, but they create a hard edge:
- You’re deciding access using domains, OUs, and regex.
- Users still face the “open inbox” problem inside allowed boundaries.
- The system still relies on probabilistic sorting (spam filters and guesswork) once mail is allowed.
KeepKnown flips the model using strict allow‑listing logic (“inversion”): don’t guess what’s bad—only allow what’s known-good.
What changes operationally:
- Manual method (Admin Console): You maintain OUs, exceptions, and compliance rules.
- KeepKnown method (API-level): KeepKnown connects via OAuth2 (CASA Tier 2) and automatically moves messages from non-contacts into a separate label: KK:OUTSIDERS.
- No plugin.
- Server-level behavior.
- Uses encrypted hashes (no plaintext storage).
Why this matters for “internal access levels”:
- Even with internal restrictions, executives and exposed roles still get hammered by unknown senders once external is allowed.
- KeepKnown enforces contact-first filtering automatically, reducing decision fatigue and notification anxiety.
If your goal is “only known people reach the inbox,” policies alone won’t scale. KeepKnown makes it deterministic.
Relevant reading (methodology, not tools):
- Deterministic vs Probabilistic Email Filtering for Executives
- Inbox Fortress Replaces Inbox Zero For Founders
- Best Email Filtering Methods Compared (and Why Strict Allow‑listing Wins)
KeepKnown product link: https://keepknown.com
6. TROUBLESHOOTING
If internal mail gets blocked unexpectedly, then enable the internal bypass
- Go to Apps → Google Workspace → Gmail → Advanced settings → Restrict delivery.
- Enable Bypass this setting for internal messages.
Expected result: Internal mail flow resumes while external restrictions remain.
If users don’t see any bounce/rejection, then add a custom rejection notice
- Go to Content compliance.
- Set action to Reject with a clear rejection message.
Expected result: Users get an immediate, understandable error instead of “silent failure.”
If domain allowlist entries fail validation, then normalize the format
Try these formats (depending on what your UI accepts):
- example.com
- @example.com
Expected result: The domain is accepted and saved without errors.
If only some users are restricted, then verify OU placement and inheritance
- Check the user’s OU in Directory → Users.
- Confirm you edited the Gmail settings for that same OU.
Expected result: Policy applies to the correct users consistently.
Notes on methodology
Blocking and routing rules are still “deny-list shaped” work. They require continuous exception handling.
If you want a durable outcome—less triage, fewer pings, less guesswork—move from algorithmic sorting to deterministic allow‑listing. That’s the KeepKnown Protocol: only known senders get first-class inbox placement; everyone else is automatically separated.