1. THE OUTCOME
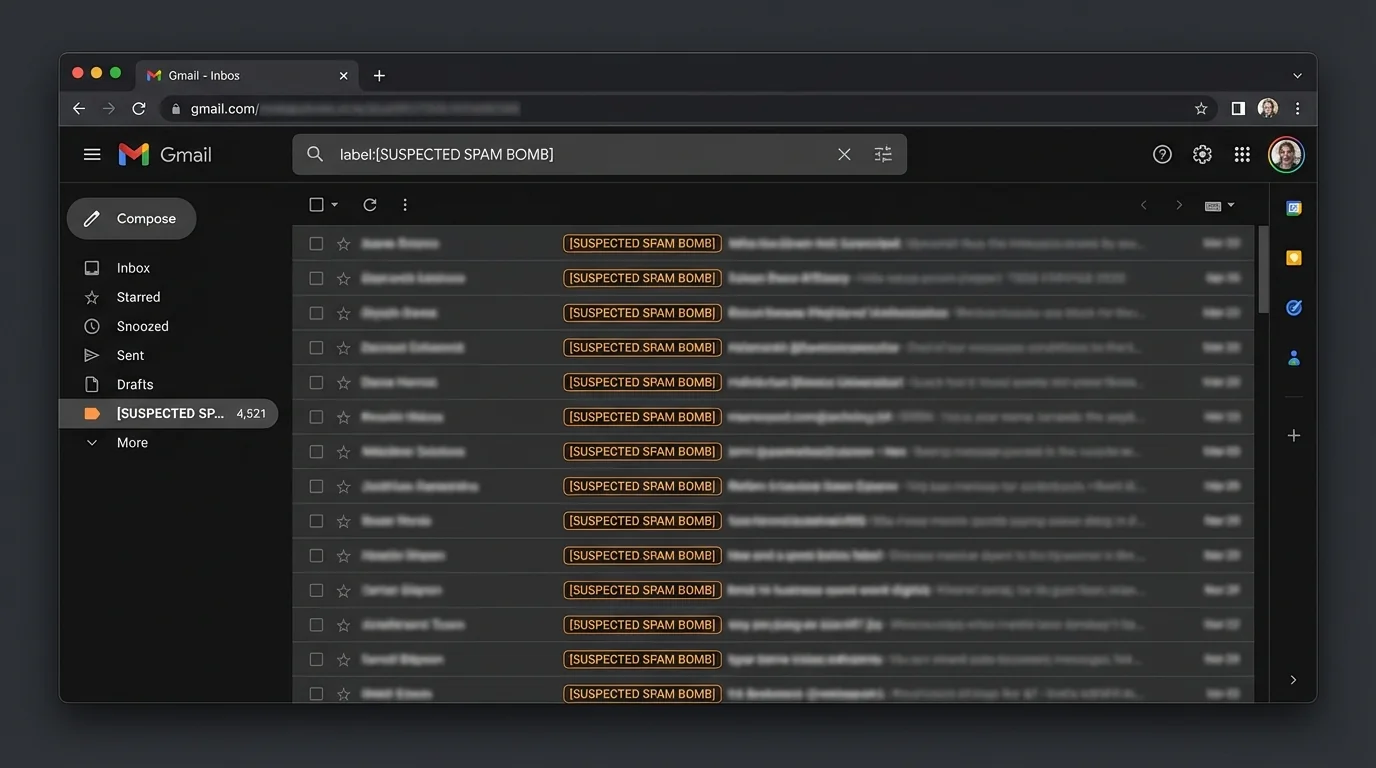
When you finish, Gmail will automatically catch spam-bomb waves (hundreds of subscription/“welcome” emails and random blasts) and route them away from your Inbox—typically into a dedicated label (like ZZ:Bombed) or straight to Trash—while your real mail stays visible. You’ll also have a repeatable “triage loop” for the next time the bomb changes senders.
2. BEFORE YOU START
- Required: A Gmail account (free @gmail.com) or Google Workspace Gmail.
- Required: Use Gmail on the web (Chrome/Firefox/Edge). Some filter controls are missing or harder to reach in mobile apps.
- Required: You can sign in to the affected inbox.
- Optional but helpful: Turn on Gmail keyboard shortcuts (Settings → See all settings → General → Keyboard shortcuts on).
- Optional but helpful: Create one “quarantine” label before you start (example: ZZ:Bombed).
- Time estimate: ~15 minutes for 2–4 filters + verification.
3. THE STEPS
Step 1: Confirm it’s a spam bomb (not one sender)
Open Gmail and scan the newest 20–50 messages.
Action: Look for many different senders, “Thanks for signing up,” “Confirm your subscription,” receipts, or random marketing—arriving within minutes.
Expected result: You can describe the bomb in one sentence (example: “Hundreds of subscription confirmations from many domains”). This matters because a single-sender attack is solved differently (block one sender vs build broader rules).
Use Gmail search to sample patterns: type newer_than:1d unsubscribe or newer_than:1d subject:(welcome OR confirm) in the search bar.
Step 2: Create a quarantine label to keep your Inbox usable
Action: Click Settings (gear) → See all settings → Labels → scroll to Labels → click Create new label.
Type a label name like ZZ:Bombed (or KK:OUTSIDERS if you want a clear “not trusted” bucket).
Expected result: A new label appears in the left sidebar, and you have a safe place to route the flood without deleting anything yet.
Put sorting labels near the bottom by prefixing with ZZ:. It keeps your sidebar clean.
Step 3: Pull one spam-bomb email and start a filter from it
Action: Open a representative spam-bomb email (one you do NOT need). Click the message More (three dots) menu → click Filter messages like this.
Expected result: A filter dialog opens with fields prefilled (usually the From address). This is faster than building from scratch.
If the bomb is many different senders, don’t rely only on From. You’ll add subject/body patterns in the next steps.
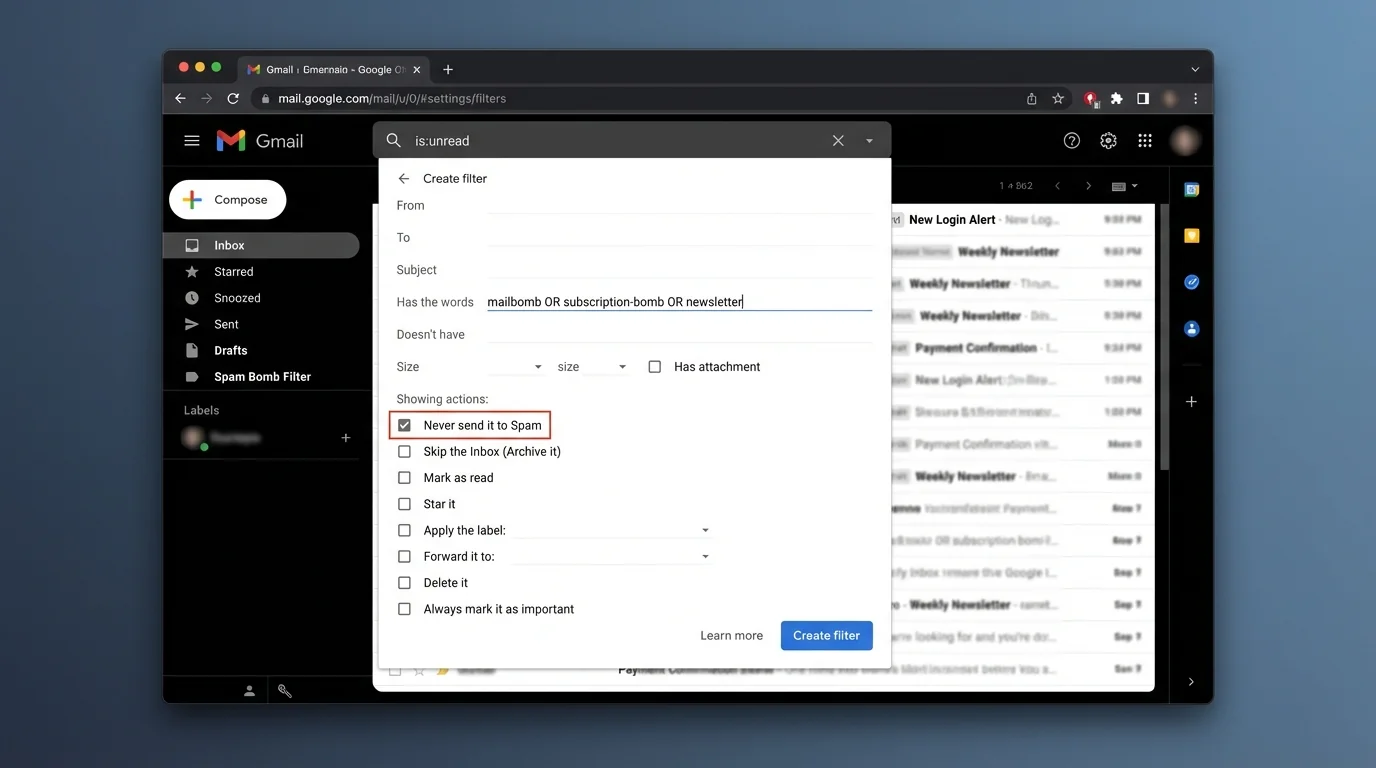
Step 4: Broaden the filter using Gmail search operators (the part people skip)
In the filter dialog, click into fields and add patterns that match the bomb.
Action: Use one of these approaches:
- In Subject, add common words like welcome or confirm.
- In Has the words, add phrases like unsubscribe or verify your email.
- In Includes the words, add multiple tokens separated by spaces.
Then click Search (or the search link/icon in the dialog) to preview matches.
Expected result: Gmail shows a search results page with many spam-bomb messages highlighted by your criteria. If you only see 1–3 emails, your filter is too narrow.
Avoid making the filter so broad that it catches real receipts, account alerts, or support emails. Always preview the search results before you create the filter.
Step 5: Create the filter and route messages out of the Inbox
Action: In the filter dialog, click Create filter (or Next). Choose actions:
- Check Skip the Inbox (Archive it)
- Check Apply the label → select ZZ:Bombed
- Optional: Check Delete it (only if you’re 100% sure)
Click Create filter to save.
Expected result: New matching messages bypass the Inbox and appear under the ZZ:Bombed label.
If you want maximum safety, don’t delete yet. Label + archive first, review later.
Step 6: Add the hidden “Never send it to Spam” control (use carefully)
Spam bombs often cause Gmail to misfile legitimate mail into Spam because the system is overwhelmed.
Action: Edit your filter to ensure legit mail is not incorrectly dropped into Spam:
1. Click Settings (gear) → See all settings
2. Click Filters and Blocked Addresses
3. Find your new filter → click edit
4. Click Continue
5. Check Never send it to Spam
6. Click Update filter
Expected result: Gmail will not route messages that match this filter into the Spam folder.
This option is powerful. If your filter is too broad, you may “protect” junk from Spam and keep it in your account (even if archived/labeled). Use it only when you’ve verified the filter matches what you intend.
Step 7: Apply the filter to the existing flood (cleanup without manual deleting)
Action: Return to Settings → See all settings → Filters and Blocked Addresses → find the filter → click edit → Continue.
Enable Also apply filter to matching conversations, then click Update filter.
Expected result: Gmail retroactively labels/archives (or deletes) the current spam-bomb backlog that matches.
For large floods, Gmail may take a minute to update. Refresh the label view if it looks unchanged.
Step 8: Add a second filter for the “subscription confirmation” class
Spam bombs usually include many “confirm your email” or “verify” messages that share vocabulary.
Action: Click the Gmail search bar dropdown (sliders icon) or use:
- Click Settings (gear) → See all settings → Filters and Blocked Addresses → Create a new filter
In Has the words, paste one of these (adjust as needed):
- confirm your subscription
- verify your email
- one last step
- manage preferences
- unsubscribe
Click Create filter, then set:
- Skip the Inbox (Archive it)
- Apply the label → ZZ:Bombed
Expected result: A broader “class-based” rule catches new variants even when sender domains rotate.
Gmail filters have practical limits (including how many keywords you can jam into one rule). If you hit a limit, split into 2–3 filters: “confirm/verify,” “welcome/thanks,” “unsubscribe/preferences.”
Step 9: Block obvious repeat senders (only when repetition is real)
Action: Open an email from a sender you keep seeing. Click More (three dots) → click Block [sender].
Expected result: Future mail from that exact address is blocked (Gmail routes it away, typically to Spam).
Blocking is weak against spam bombs because senders rotate. Use it as a mop-up, not your main defense.
Step 10: Tighten your search patterns using domain-wide matches
When the bomb includes clusters from the same domain family, filtering by domain is cleaner than filtering by full address.
Action: Create a new filter:
- Settings → See all settings → Filters and Blocked Addresses → Create a new filter
In From, use domain patterns like:
- *@example.com
- *@mailer.example.com
Then action:
- Skip the Inbox (Archive it)
- Apply the label → ZZ:Bombed
Expected result: Every sender at that domain goes to the quarantine label automatically.
Don’t domain-block large platforms you rely on for real mail. Domain filters are “big hammers.”
Step 11: Verify you didn’t trap real mail
Action: Click your ZZ:Bombed label. Open 10–20 messages and confirm they’re junk.
If you see legitimate messages:
- Click the message
- Click More (three dots) → Filter messages like this
- Click edit later to narrow keywords (remove generic words like “welcome” if they match your real tools)
Expected result: The quarantine label contains junk, not critical personal or work email.
If you need to recover a message, select it → click Move to Inbox or Remove label.
Step 12: (Optional) Use the “catch-all whitelist” trick only as a temporary emergency lever
This is a lesser-known technique: create a filter that matches almost everything, then force Never send it to Spam so important mail doesn’t disappear while you’re under attack.
Action:
1. Click Settings → See all settings → Filters and Blocked Addresses → Create a new filter
2. In Doesn’t have, type a nonsense string that won’t appear in email, like X7tr9z!9
3. Click Create filter
4. Check Never send it to Spam
5. (Do NOT check Delete it)
6. Click Create filter
Expected result: Almost all mail is prevented from being auto-routed into Spam.
This reduces Gmail’s spam protection. Use it only when you’re actively losing real mail to Spam, then remove/disable it after the crisis.
Step 13: Stabilize notifications (stop the stress spike)
Action: Click Settings → See all settings → General → adjust:
- Desktop notifications → set to Off (temporary)
- Inbox type → consider Priority Inbox only if it helps you focus (don’t rely on “guessing” tabs)
Expected result: Your devices stop pinging you for each incoming bomb message, and you can do cleanup calmly.
4. COMMON PATTERNS (copy/paste examples)
Use these as starting points. Always preview the search before saving the filter.
Pattern A: Subscription/confirmation floods
- Filter field: Has the words
- Value:
unsubscribe confirm your subscription verify your email manage preferences - Action: Apply label
ZZ:Bombed+ Skip the Inbox (Archive it)
Pattern B: “Welcome” + marketing automation
- Filter field: Subject
- Value:
welcome - Action: Apply label
ZZ:Bombed+ Skip the Inbox (Archive it)
Pattern C: Domain cluster (rotating senders at one domain)
- Filter field: From
- Value:
*@noisy-domain.com - Action: Apply label
ZZ:Bombed+ Skip the Inbox (Archive it)
Pattern D: Extreme cleanup (when you’re confident it’s junk)
- Filter field: Has the words
- Value:
unsubscribe - Action: Delete it
“Delete it” is irreversible once Trash is emptied. Start with label+archive, then escalate.
If you want more filter mechanics and safe label workflows, see How to Set Up Gmail Filters (Precision Tutorial) and How to Create Gmail Labels Fast and Correctly.
5. THE BETTER WAY (KeepKnown protocol: invert the problem)
Spam bombing is what happens when your inbox is built on the wrong default: “anyone can reach you, then you sort it out.” That’s blacklisting and algorithmic guessing. It fails because attackers don’t need to be consistent—they just need volume.
Manual Gmail filters (what you set up above) are still a blacklist-style defense:
- You guess what’s bad (keywords, domains)
- The attacker changes patterns
- You patch filters forever
The KeepKnown methodology is the inversion:
- Don’t guess who’s bad
- Only allow who’s good
KeepKnown connects via an API-based email filter (not a plugin) and automatically moves mail from non-contacts into a separate label (commonly KK:OUTSIDERS) at the server level. That means:
- Spam bombs stop being an Inbox event
- You read trusted mail first
- Outsiders are processed on your schedule
Security basics you should care about: KeepKnown uses OAuth2, is CASA Tier 2, and stores only encrypted hashes (no plaintext email content storage).
If you’re ready to stop “open inbox” as a concept, start at https://keepknown.com and compare methodologies here:
- AI Email Sorting vs Whitelisting for Inbox Control
- Spam Filters vs Allowlists Which Wins
- Stop Organizing Email Start Screening It
6. TROUBLESHOOTING
If the bomb keeps getting through because senders rotate
Then stop filtering by exact address.
- Use keyword/class filters in Has the words (confirm/verify/unsubscribe)
- Add domain-wide filters when you see repeat domains: *@domain.com
If legitimate emails are going to Spam during the attack
Then protect critical classes of mail.
- Create a narrow filter for your real senders/domains and check Never send it to Spam
- As a temporary emergency lever, use the Doesn’t have = X7tr9z!9 catch-all with Never send it to Spam, then remove it later
If your filter is catching too much
Then narrow the criteria before you delete anything.
- Remove generic tokens (like only welcome)
- Add combinations (like welcome unsubscribe) so you match marketing templates, not real transactional mail
- Always preview the search results before saving
If cleanup feels endless
Then switch from “Inbox deleting” to “Label review.”
- Route everything to ZZ:Bombed
- Review 20 messages, refine the filter, repeat
- Archive/Trash in bulk from the label view
If the flood made Inbox management feel physically stressful, that’s a known pattern—see Email Anxiety Symptoms: Why “Managing Your Inbox” Is Making You Worse.