1. THE OUTCOME
When you’re done, Outlook will treat everyone who is not explicitly trusted as an outsider. Messages from people in your Contacts / Safe senders will land in your Inbox. Everything else will be routed to Junk Email (or quarantined by your organization). You’ll stop doing daily “delete triage” and instead review outsiders on your schedule.
This is strict allow‑listing (good). It’s the opposite of spam filtering and AI sorting (bad), which try to guess what’s unwanted and guess wrong.
2. BEFORE YOU START
- Required: Account type
- Works best on Outlook on the web: Outlook.com or Microsoft 365 at
https://outlook.office.com. - Desktop apps and mobile apps may not expose the full junk controls.
- Required: Permissions
- If your mailbox is controlled by IT, your org may override Junk Email settings.
- Required: Browser
- Use a current version of Edge, Chrome, or Firefox. Old browsers can hide settings.
- Required: A reliable Contacts list
- The whole method depends on “known good people” being in Contacts or Safe Senders.
- Optional but helpful first
- Disable Focused Inbox so you can verify results in one place: Settings → Mail → Layout → Focused inbox.
- If you keep missing email already, fix deliverability first: Solve Email Not Receiving: Step-by-Step Guide.
- Time estimate
- Base setup: 3–5 minutes
- Auditing/adding contacts: 10–25 minutes
This does not delete email. It reroutes it. If you never check Junk Email, you can miss legitimate first-time senders.
3. THE STEPS
Step 1: Sign in to Outlook on the web
Go to https://outlook.office.com (work/school) or https://outlook.com (personal) and sign in.
Expected result: You can see your Inbox in the browser.
If you’re in an “early preview” interface and can’t find full settings, switch to the standard view by opening Outlook in an InPrivate/Incognito window and signing in again.
Step 2: Open the full settings panel
Click Settings (gear icon) in the top-right → click View all Outlook settings.
Expected result: A settings window opens with categories like Mail, Calendar, and General.
If you only see a small quick-settings panel, you’re not in the full settings view yet. Scroll the panel to the bottom and click View all Outlook settings.
Step 3: Navigate to Junk Email controls
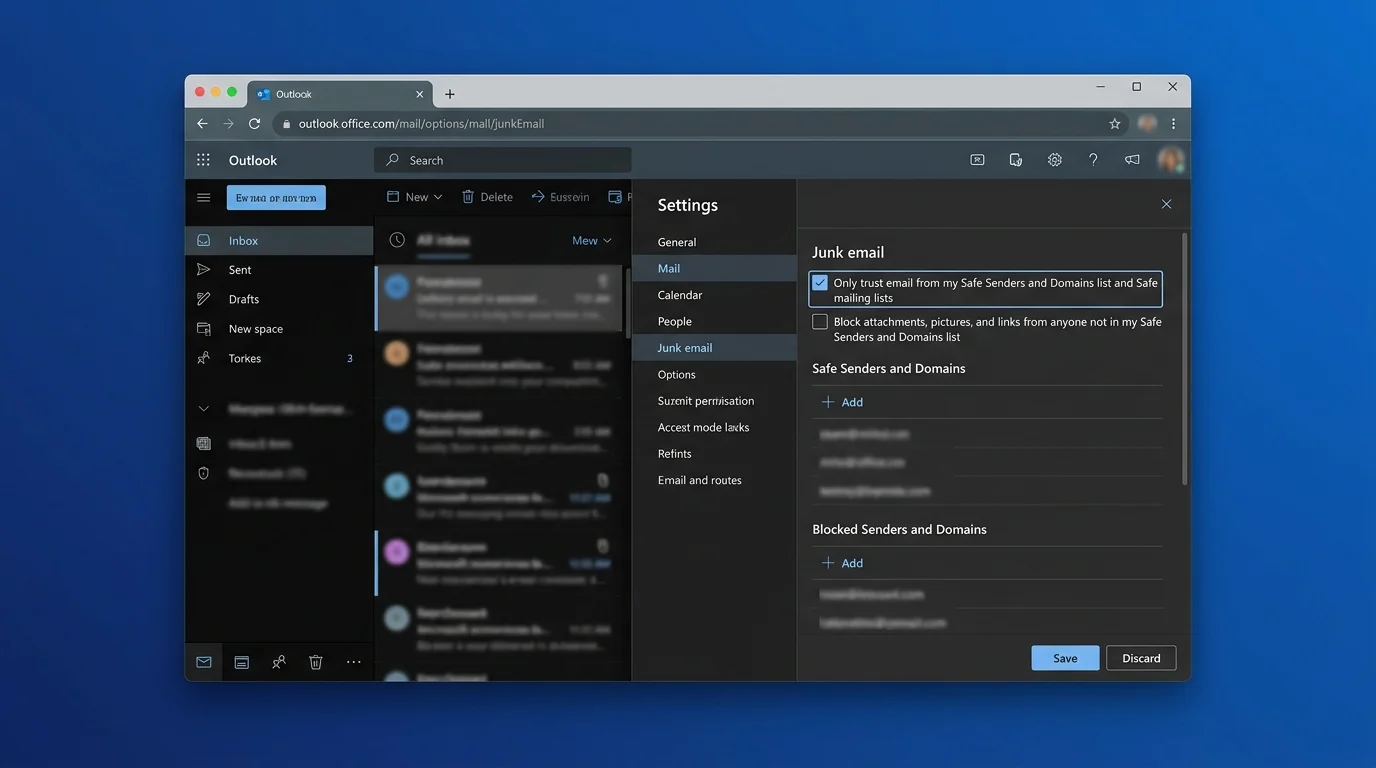
In the settings window, click Mail → Junk email.
Expected result: You see sections for Safe senders and domains, Safe mailing lists, Blocked senders and domains, and Filters.
Step 4: Enable strict allow-listing using Safe Senders
Under Filters, enable:
- Only trust email from addresses in my Safe senders and domains list and Safe mailing lists
Then click Save.
Expected result: Any sender not on your Safe lists is treated as untrusted and will be routed away from your Inbox (typically into Junk Email).
This is the “hidden gem” switch. Without it, you’re still doing normal spam filtering (probabilistic guessing) instead of strict allow-listing (deterministic control).
Step 5: Enable trust-from-contacts (if your tenant has it)
Still on Mail → Junk email, look for a checkbox such as:
- Trust email from my contacts (wording varies)
If it exists, enable it → click Save.
Expected result: People in your Outlook Contacts are treated as trusted without adding each one manually to Safe Senders.
Some Microsoft 365 organizations hide this option. If you don’t see it, use Step 6 to build your Safe Senders list.
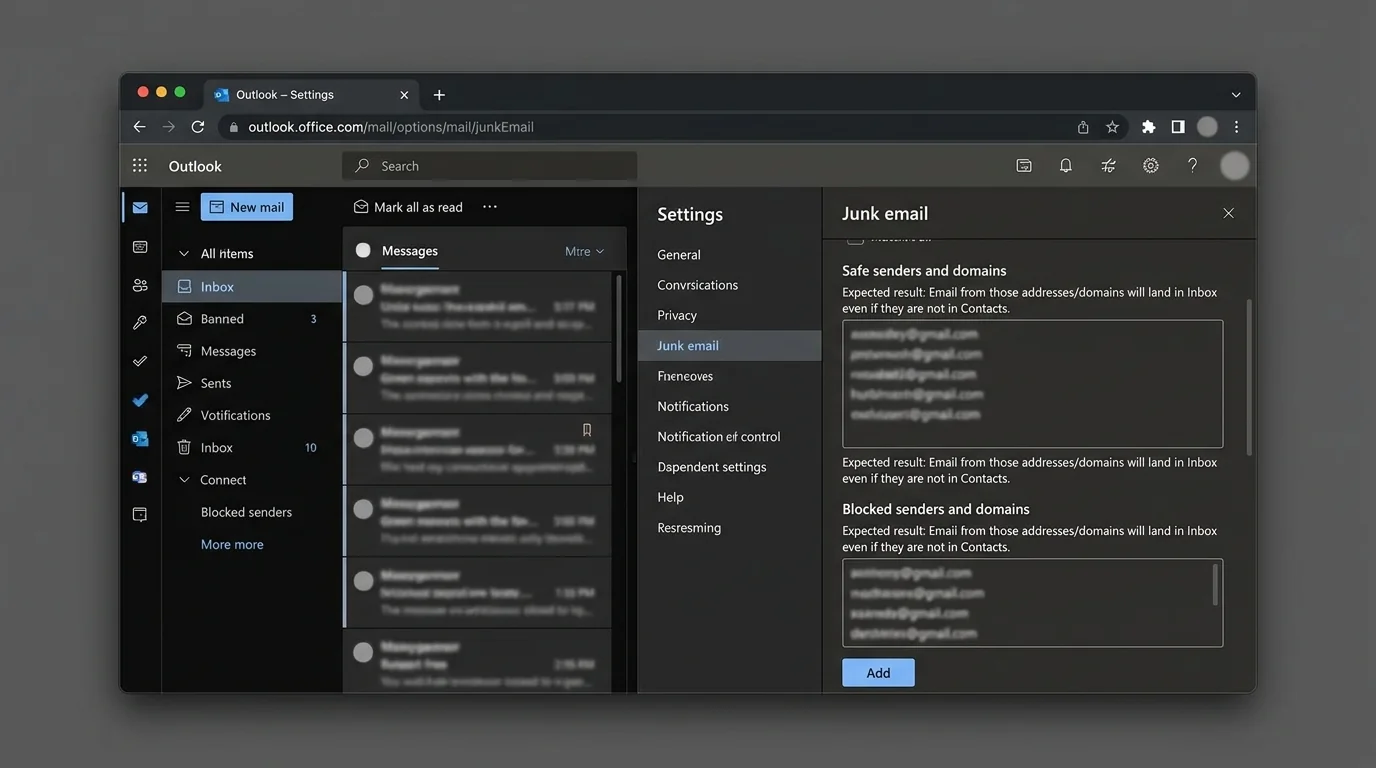
Step 6: Add must-receive people to Safe Senders
In Mail → Junk email, under Safe senders and domains, click Add and enter:
- A single email address (best for VIPs): ceo@company.com
- Or a domain (best for internal teams): company.com
Repeat for your critical senders, then click Save.
Expected result: Email from those addresses/domains will land in Inbox even if they are not in Contacts.
Be careful with domain allow‑listing. Adding gmail.com or outlook.com effectively allows the entire internet.
For domain guidance, use: How to Whitelist a Domain in Gmail and Outlook Safely.
Step 7: Add legitimate listservs to Safe Mailing Lists
Under Safe mailing lists, click Add and enter the list address (example):
- all-hands@lists.company.com
Click Save.
Expected result: Messages sent via those mailing lists will be trusted and reach your Inbox.
Mailing lists often rewrite headers. If a list keeps going to Junk, allow the list address (not the person posting to the list).
Step 8: Decide what to do with outsiders (review vs purge)
Click Mail in the left of settings → click Junk email again and confirm your intent:
- If you want to review outsiders: keep it as-is and check Junk Email once daily.
- If you want to reduce noise further: add chronic offenders under Blocked senders and domains.
Expected result: You have a clear policy: Inbox is for known people; outsiders are reviewed on your schedule.
Blocked senders usually still deliver to Junk Email. Blocking is not deletion. Also, inbox rules typically do not run on mail that is already routed to Junk.
Step 9: Train Outlook when it gets a trusted sender wrong
Open Junk Email from the left sidebar.
For a legitimate message in Junk:
1. Select the message.
2. Click Not junk (toolbar option).
3. If prompted, choose to Always trust that sender.
Expected result: The message moves to Inbox, and the sender is added to a trusted list.
If you’re doing strict allow‑listing, “Not junk” is your fast way to graduate a sender into the allow-list.
Step 10: Test with one trusted and one untrusted sender
Send yourself two emails:
- From a trusted address (in Contacts or Safe Senders)
- From an untrusted address (not in Contacts, not in Safe Senders)
Then check Inbox and Junk Email.
Expected result:
- Trusted sender → arrives in Inbox
- Untrusted sender → arrives in Junk Email
If both land in Inbox, you missed Step 4 (the strict trust toggle) or your org overrides junk settings.
Step 11: Lock down “false trust” sources
Go to Settings → Mail → Junk email and review:
- Safe senders and domains (remove anything too broad)
- Safe mailing lists (remove unused lists)
Click Save.
Expected result: Your allow-list contains only people/systems you actually want.
For the security tradeoffs of allow lists, read: Stop Trusting Microsoft 365 Safe Senders.
Step 12: Create an operating routine (so you don’t miss first-timers)
Pick one routine and stick to it:
- Routine A (most common): Check Junk Email once per day for 60 seconds.
- Routine B (executives): Check outsiders twice per week, and require intros to come via known contacts.
Expected result: You keep control without returning to “open inbox” chaos.
If you want an executive-grade approach, see: How to Set Up Executive Allow Lists in Outlook 365.
4. COMMON PATTERNS
These are practical ways people actually use strict allow‑listing once it’s enabled.
Pattern 1: Trust your company domain (internal only)
- Value to add (Safe senders and domains):
company.com - Why: Internal email should never be treated as “outsider.”
- Expected result: All colleagues can reach you without being individually added.
Do this only if you trust your internal identity controls. If internal accounts are frequently compromised, be stricter.
Pattern 2: Allow your payroll, invoicing, and bank alerts
- Values to add:
payroll@vendor.combilling@vendor.comalerts@yourbank.com- Why: These are operationally critical and often sent from systems, not people.
- Expected result: Important system mail reaches Inbox without daily hunting.
Pattern 3: Allow a partner domain, not the whole internet
- Value to add:
partner-firm.com - Why: It’s safer than allowing a public email provider domain.
- Expected result: New people at that partner firm can email you and still reach Inbox.
Pattern 4: Handle newsletters without fighting “unsubscribe” failure
Strict allow‑listing flips the model:
- Do not chase unsubscribe links.
- Do remove the sender from Safe Senders so future messages route to Junk.
- Value to remove:
news@newsletter.com - Why: Unsubscribe often fails, resubscribes, or spawns new lists.
- Expected result: Newsletters stop reaching Inbox immediately.
If unsubscribe keeps failing across senders, see: Unsubscribe Not Working: Methods Compared That Actually Scale.
5. THE BETTER WAY: KeepKnown’s contact-first filtering (server-side)
Outlook’s built-in method works, but it has three structural weaknesses:
1. It’s easy to over-allow (one sloppy domain entry can reopen your inbox to strangers).
2. It’s UI-driven (settings differ by interface; options can be hidden by org policy).
3. It’s still mailbox-native (you end up monitoring Junk because “unknown” is mixed with “bad”).
KeepKnown applies the same philosophy—only allow the good—but does it at the API level (server-side), not via a fragile UI toggle:
- Mechanism: API-based email filter (not a plugin).
- Action: Automatically moves non-contacts to a dedicated folder/label: KK:OUTSIDERS.
- Security: OAuth2 verified, CASA Tier 2, encrypted hashes (no plaintext storage).
- Platforms: Outlook/Microsoft 365 plus major providers.
What you gain:
- Your Inbox becomes a deterministic allow-list feed.
- Outsiders are isolated in a clearly named place (KK:OUTSIDERS), not mixed into Junk heuristics.
- You reduce decision fatigue (delete/ignore/respond loops) and notification anxiety.
This is the KeepKnown Protocol: strict allow‑listing that stays consistent across devices and interfaces. Details at https://keepknown.com.
If you want the deeper security comparison behind “server-side vs client-side,” read: Server-Side vs Client-Side Email Filtering Security Tradeoffs.
6. TROUBLESHOOTING
Use these fixes in order. Don’t change ten settings at once.
If legitimate mail is landing in Junk, then graduate the sender
Do this: Open the message in Junk Email → click Not junk → choose Always trust if prompted.
Why: Strict allow‑listing requires explicit trust.
Expected result: Future mail from that sender lands in Inbox.
If you can’t find “Only trust email from…” then switch interfaces
Do this: Use Outlook on the web → Settings → View all Outlook settings → Mail → Junk email.
Why: Many guides reference old menus; some views hide the critical filter.
Expected result: The Filters section appears.
If your settings don’t “stick,” then suspect organization policy
Do this: Ask IT whether junk email settings are centrally managed (Exchange Online protection policies).
Why: Admin policies can override user junk preferences.
Expected result: You learn whether you can control allow-listing yourself or need an admin change.
If you expected rules to run but the mail went to Junk, then stop relying on rules
Do this: Don’t build an inbox rule assuming it will catch Junk-routed mail. Instead, fix trust at the source:
- Add sender/domain to Safe senders and domains, or
- Add them to Contacts (and enable Trust email from my contacts if available).
Why: Rules commonly don’t apply to mail already delivered to Junk.
Expected result: Trusted mail reaches Inbox first, where rules can apply normally.
Related reading
- For a tighter, dedicated allow-list mode explanation: How to Enable Outlook Whitelist Only Mode
- For a strict policy blueprint: How to Configure Strict Allow Listing in Outlook 365
- For the cognitive payoff of this approach: Curated Inbox Cognitive Hygiene Wins